

How To Fade In Color Curve Vegas 12
Vegas Pro Color Correction Tutorial for Beginners

Aug 30, 2022• Proven solutions
It is non possible to do color correction without professional person knowledge just for beginners information technology is important to learn color correction terms first. Vegas Pro is one of the all-time software tools for applying color correction on images/videos and the article below contains complete data about how to apply Vegas Pro for colour correction applications. For those who want to know all near the how to correct color in Vegas Pro, post-obit details can provide consummate information with examples.
- Function ane: Terms Definition
- Office 2: How to correct colour in Vegas Pro – Examples
Vegas Pro is recommended for professionals due to its advanced user interface and higher cost range. The sad function is that it can exist used just on Windows devices, and so if yous are searching for something that tin can work on both Window too as Mac devices so Wondershare Filmora is all-time answer for all your needs. This powerful tool is designed with easy to use software interface and it can exist downloaded easily from official website of Wondershare Filmora.


Related article:Color grading and color correction in postal service video creation
Part ane: Terms Definition
Some of you lot might have heard about the basic terms used in colour signals that are brightness, hue and saturation. All of these play important role in every color paradigm or video signal so it is necessary to be familiar with their basic definitions as well equally their employ in Vegas Pro.
The tabular array below contains complete data nearly color correction terms:
| Terms | Definition | How to adjust them in Vegas Pro | How to bank check them in Vegas Pro |
|---|---|---|---|
| Tonal Range | | | |
| Full Tonal Range | | | |
| Shadows | | | |
| Mid-tones | | | |
| Highlights | | | |
| Gamma | | | |
| Contrast | | | |
| Hue | | | |
| Saturation | | | |
| Effulgence | | | |
| RGB | | | |
Part 2: How to right color in Vegas Pro – Examples
Following steps can help you to empathize the implementation of color correction tool in Vegas Pro:
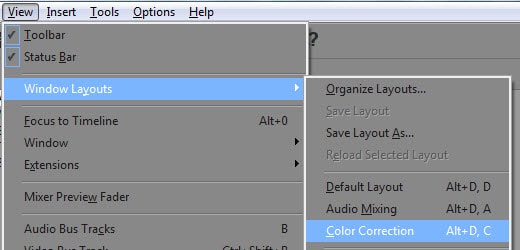
Step ane: Turn on Videoscope
On software screen, get to View present at top left corner and then from drib down menu select Windows layouts, farther you need to choose Color Correction.
Actually Vegas Pro software possesses four dissimilar color/video scopes that can exist used for dissimilar purpose as described in the table above. Vectorscope, Histogram, Waveform and RGB Parade provide complete assay of video signal. With the help of these easy to manipulate tools users tin can adjust highlights, mid tones, shadows, gamma values, luminance values, hue and saturation, dissimilarity and effulgence besides as tonal range for the input signal.
Step 2: Vectorscope
As already discussed in previous section, Vectorscope is used to provide data related to basic components of video signals that are saturation and hue.
When a value lies at central position of this scope that ways it have zero saturation and hue is as well missing. Equally the values proceed on moving far away from center point, the amount of hue and saturation into color indicate gets added. The information one vectorscope scale are represented in terms of chief and secondary colors where ruby-red, green and blueish belongs to get-go category and xanthous, magenta and cyan are from second category.
Here I take the photo of my dog shot 5 years ago with my smartphone as an example:
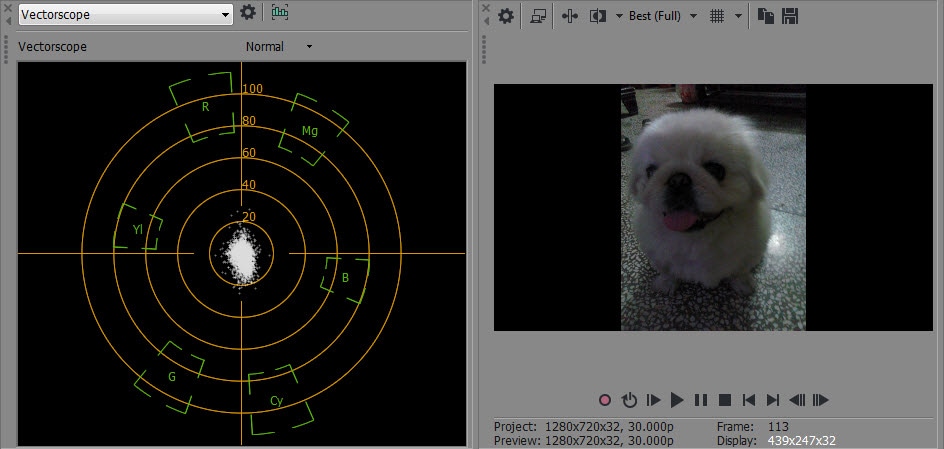
Yous can see that all the dots are around the eye on the Vectorscope and that means there are many different hues on this image, merely they are not very saturated.
Plugin used - Color corrector:
Open the Video Event FX Window by clicking on the Upshot FX icon available on screen; and then get to Vegas Colour Corrector, hit Ok, then go for custom settings and finally increase saturation equally per demand. The event will exist directly observed on epitome as dots on Vectorscope volition go more distributed away from eye bespeak.

Footstep 3: Waveform
This tool denotes brightness related data.
Observing things on waveform monitor while moving from left to correct is same as looking on video preview window in the same direction. If more number of dots are vertically aligned so it represents higher value of brightness.
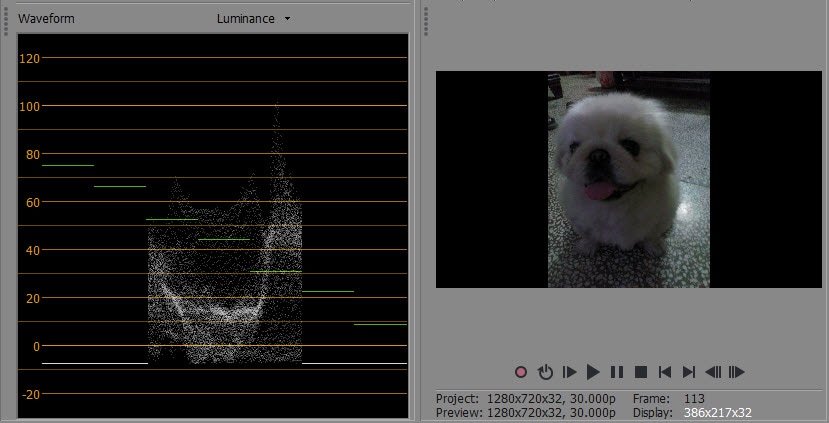
From the screenshot above, nosotros can tell that this prototype is lacking of effulgence
Plugin used - Brightness and Contrast:
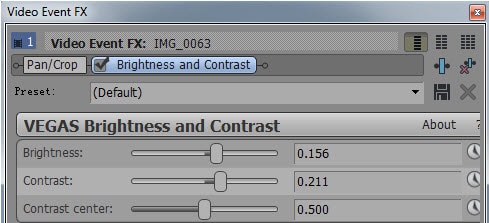
Increase the Brightness and Contrast by dragging the handle to right
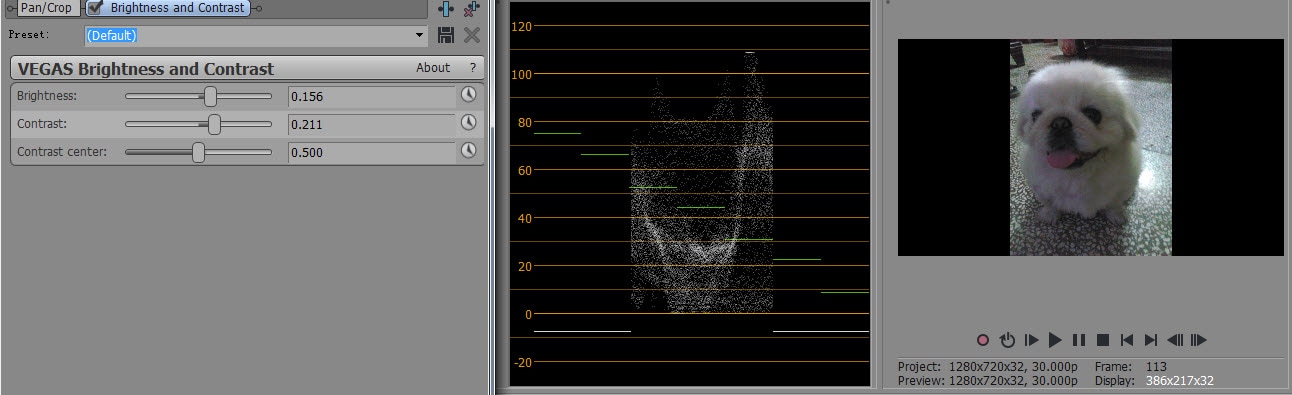
Now we can see the photo already looks meliorate and clearer than the original.
Step iv: Histogram
Histogram provides data about contrast and brightness.
On this scale, the vertical lines ranging from left side displays black (0) leading to luminance information and it extends towards correct side up to 255 that is extreme white representation. Height of these lines display amount of pixels used to represent any particular image along with luminance values.
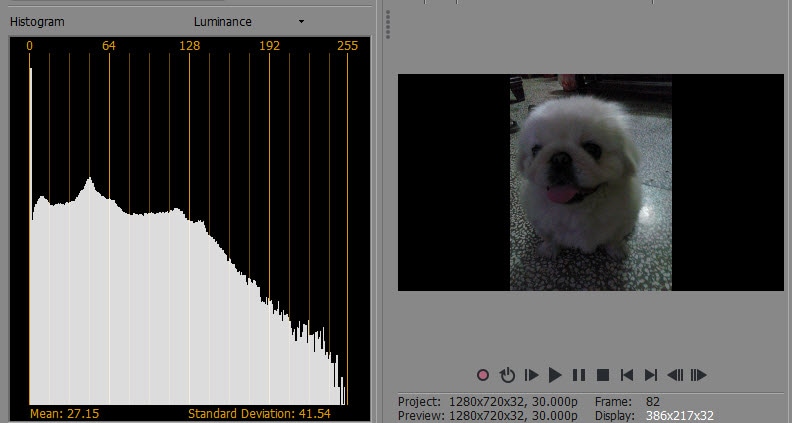
We can see from the Histogram that at that place too much Shadows and no Highlights of the original photo.
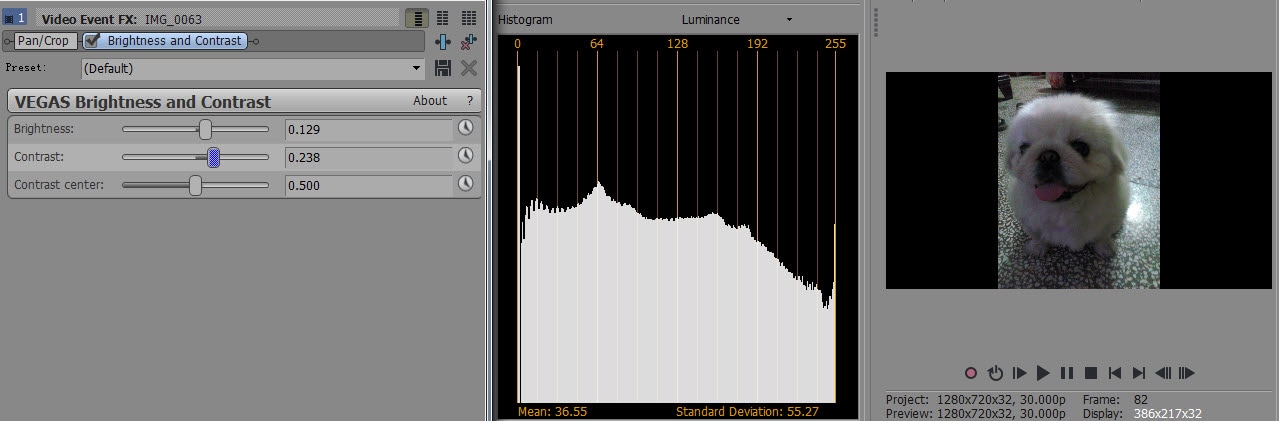
Plugin used - Brigthness and Dissimilarity:
Increasing the Brightness and Dissimilarity sliders, so now the image has exact Shadows, Mid-tones and Highlights
Step 5: RGB Parade
RGB Parade tool is used to brandish information related to brightness of RGB colors.
This scope tin provide quick information almost all brightness levels while showing event of each principal colour individually.
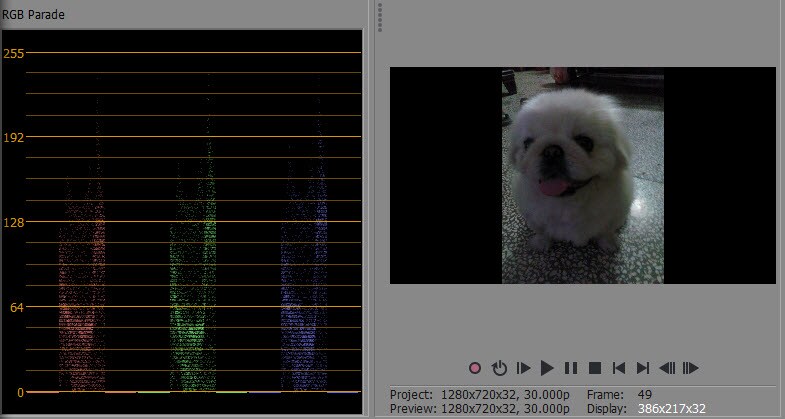
From the screenshot above, you lot can see a ring of dots in the Shadow surface area. That ways there are too much blacks and lack of highlights.
Plugin used - Color Curves
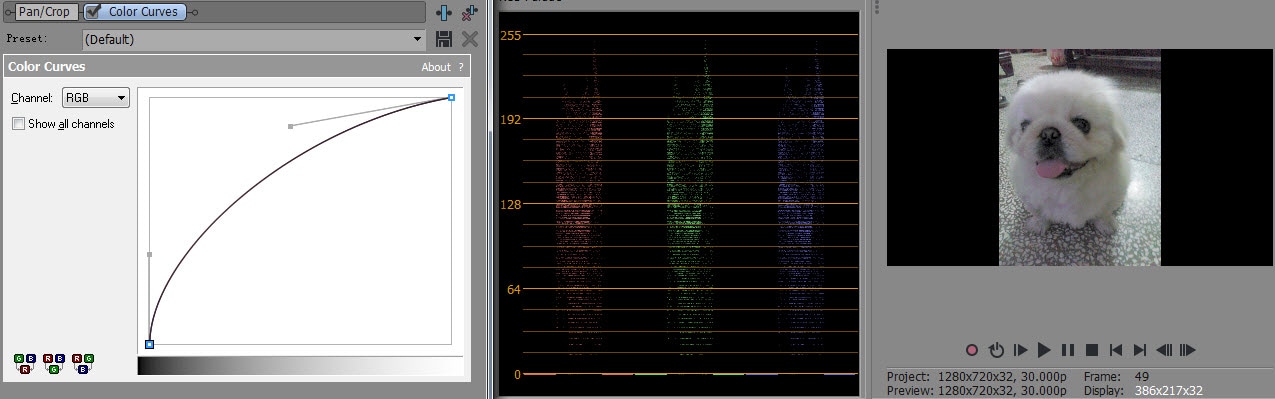
The bottom handle slightly make the image closer to true white. The longer top handle I created at the top expands all the compressed dots that were locating in the lower mid-tone region and too at the same fourth dimension increment the brightness of the whole video.
Decision
If you lot desire to know more about Sony Vegas, check this video to know how to utilize a motion-picture show look by using color correction tools in Sony Vegas Pro.
Source: https://filmora.wondershare.com/vegas-pro/color-correction-in-sony-vegas-pro.html
Posted by: lainezdrinnera76.blogspot.com
0 Response to "How To Fade In Color Curve Vegas 12"
Post a Comment